Fun and Easy Crafts for Weekend Warriors
Weekend warriors, it's time to step up your game! If you're tired of the same old routine and looking for a way to inject some fun into your weekends, we've got the perfect solution for you.
Definition of Weekend Warriors
Who are weekend warriors, you may ask? The term typically refers to people who put in their nine to five during the week but like to tackle new and creative projects and hobbies during the weekend. They're not afraid to roll up their sleeves and get their hands dirty on their days off!
Importance of Hobbies and DIY Projects
Why should you consider picking up a hobby or trying out a DIY project this weekend? Well, hobbies are not only a great way to relieve stress, but they can also be incredibly fulfilling. Whether it's the sense of accomplishment that comes from completing a project or the joy of creating something with your own two hands, the benefits are numerous. Plus, who knows, you might uncover a hidden talent or develop a new passion!
Overview of the Crafts to be Discussed
We've curated a list of 10 exciting crafts for you to try. Whether you fancy something simple or a bit more challenging, we have got you covered! From playing around with stock photos to creating cute home decor, there's something for everyone on this list. So grab your crafting tools, and let's dive into the world of DIY!
Craft 1: Handmade Greeting Cards
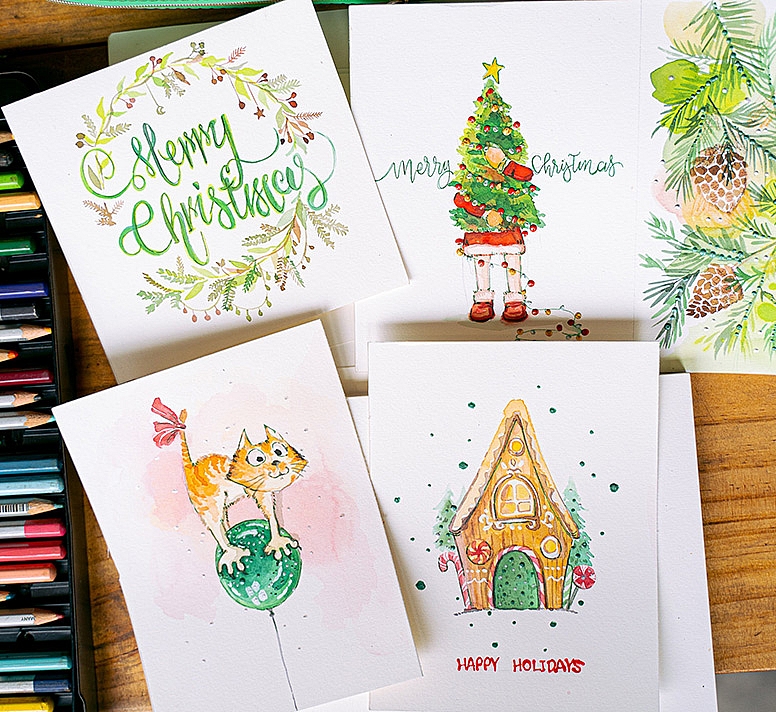
Who doesn't love getting a heartful, handmade card on a special occasion? That's right, no one! So why not spend a little bit of your weekend creating colourful, customized greeting cards? Not only is it a fun activity, but these cards also hold a personal touch that store-bought ones can't match.
Supplies Needed
To get started with your handmade greeting cards, you will need some basic supplies. Here's your checklist:
- Cardstock or any thick paper
- Colourful markers, pens, or paints
- Glitter, stickers, or any other craft embellishments
- A pair of scissors
- Glue
Step-By-Step Instructions
Begin by folding your cardstock into the shape of a card. Next, pick a design or theme for your card and start drawing or painting. After your artwork is dried, add glitter or stickers for a dash of sparkle. Don't forget to pen down a heartfelt message inside!
Tips for Personalization
The beauty of DIY greeting cards is that they can be personalized to any extent. You could use a photograph to make it extra special or incorporate elements of the recipient's personality or interests into the design. The sky's the limit when it comes to personalizing these little pieces of joy! Get creative and let your imagination run wild. Remember, it's the thought that counts, not the perfection of your artwork.
Craft 2: Painted Flower Pots
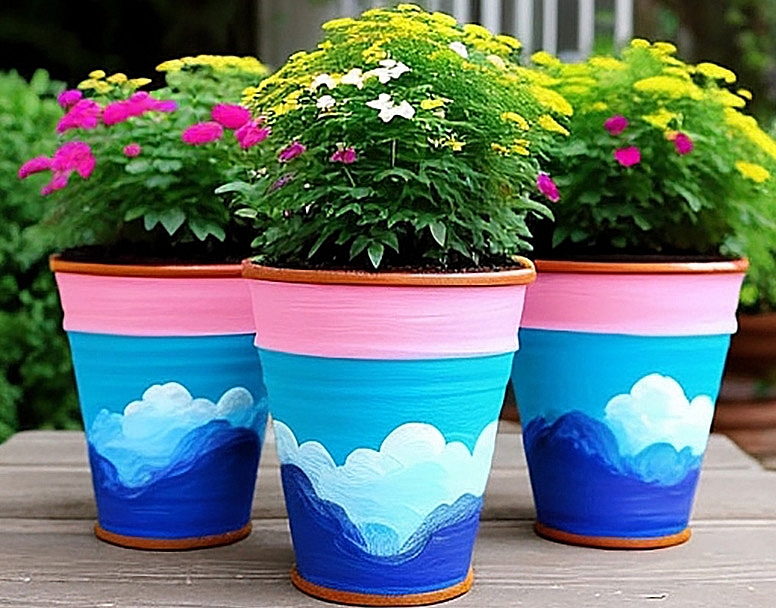
Bring a touch of nature into your home with our next weekend craft with painted flower pots. Ideal for indoor plants, these vibrant and colourful pots will add a unique personality to your space.
Materials Required
Getting started is easy peasy. You'll need:
- Terracotta pots
- Acrylic paint
- Paint brushes
- Varnish (optional)
Techniques and Design Ideas
Start by applying a base coat of paint to your pot. Once it's dry, the canvas is yours to create on. From simple stripes and polka dots to fancier designs like marbling or even hand-painting your favourite flower, anything goes. Be creative and don't be afraid to mix and match different designs and colours.
Care Instructions for the Finished Pots
Your newly crafted masterpieces deserve proper care. To clean them, use a soft, damp cloth and gently wipe down as needed. If you've opted for a varnish finish, keep them out of prolonged direct sunlight as it could fade the colors. Go ahead, roll up those sleeves and create some adorable home decor!
Craft 3: DIY Coasters
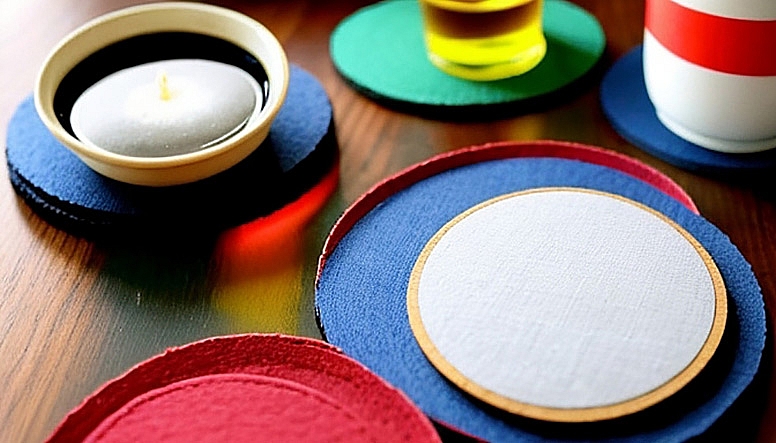
Coasters aren't just functional; they can also be pieces that add character to your home. Making your own set of DIY coasters gives you the freedom to design them in a style that suits your home decor.
Different Coaster Materials and Styles
There are endless options when it comes to materials for creating DIY coasters. Cardstock, ceramic tiles, cork, and even popsicle sticks can all be turned into stunning coaster sets. You can also play around with different styles such as rustic, modern, or whimsical. The possibilities are only limited by your imagination!
Step-by-Step Guide to Making Coasters
Making your coasters is as easy as:
• Choosing your material and cutting it into squares.
• Decorating each square in your chosen style.
• Sealing your design with a waterproof sealant.
The result? A set of gorgeous, custom coasters that will not only protect your tables but also show off your creative flair.
Creative Ways to Personalize Coasters
When it comes to personalizing your DIY coasters, the sky's the limit. You could add text using stencilled letters, create geometric patterns with colourful paints, or embellish your coasters with beads or sequins.
With materials like stock photos, you could incorporate images that resonate with you. Alternatively, you could use a clear varnish and embed small objects or pictures for a cool 3D effect. No matter what you choose, your homemade coasters are sure to impress your guests!
Craft 4: Upcycled Mason Jar Lanterns
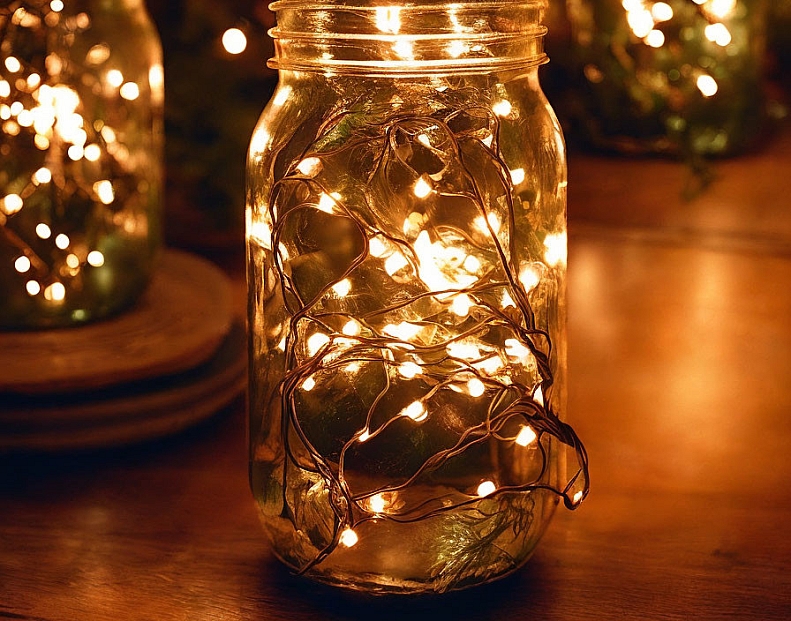
There is something uniquely warm and inviting about lanterns. Their soft light sets the mood and gives any space an irresistibly cosy feel. But you don't need to go any further than your kitchen to source one. Create these delightful Mason Jar lanterns with just a few simple materials and transform your evenings into glowing escapades - whether it's a backyard party or a quiet night in.
Materials Needed
Here's what you will need for this DIY project:
- Empty Mason jars
light stringsts or LED lightstrings
- Hot glue gun and glue sticks
- Ribbon or twine
Instructions for Creating Lanterns
It all starts with cleaning your mason jars and drying them thoroughly. Once done, put the fairy lights inside the jar and secure the lid tightly. Apply hot glue on the neck of the jar and wrap the ribbon or twine around it, making sure it stays in place. And voila! Your Mason jar lantern is ready to shine.
Ideas for Using Lanterns as Decor
These jars are incredibly versatile. You can place them on your patio for an evening get-together, arrange them on stairs or windows for Christmas, hang them around your garden for a magical feel, or use them as bedside lamps to read your favourite book under the soft, warm light. They also make perfect gifts for craft-loving friends or family. So, get glueing and light up your weekends!
Craft 5: Homemade Scented Candles
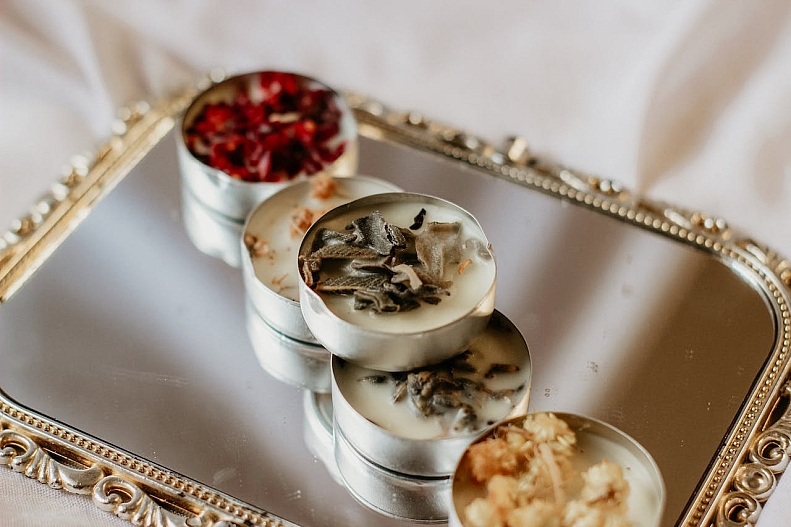
There's something incredibly soothing about the flicker of a homemade candle, made even better when it's fragranced with your favourite scent. This is a truly rewarding DIY project that's also surprisingly straightforward.
Types of Wax and Wicks
There are various types of wax you can choose from for your project such as paraffin, soy, or beeswax. Each one has its unique texture and burn time. As per wicks, selecting a size and type would depend on the type of wax and the diameter of your candle container.
Step-by-step Candle Making Process
- Melt your chosen wax in a double boiler.
- While the wax is melting, secure your wick to the bottom of your chosen container.
- Once the wax is liquified, allow it to cool for a few minutes.
- Pour it into your container, ensuring the wick stands upright.
Tips for Adding Fragrance and Colour
Adding fragrance and colour to your homemade candles can provide a personalized touch. Essential oils are a safe and natural choice for scents, and a few drops go a long way! Undiluted candle dyes, on the other hand, are perfect for colouring. Stir in your chosen scent and colour into the cooled, still-liquified wax before pouring it into your container. Remember, less is more when it comes to adding these extras. After all, you want the relaxing glow of your DIY weekend-crafted candle to take centre stage.
Craft 6: Customized Tote Bags
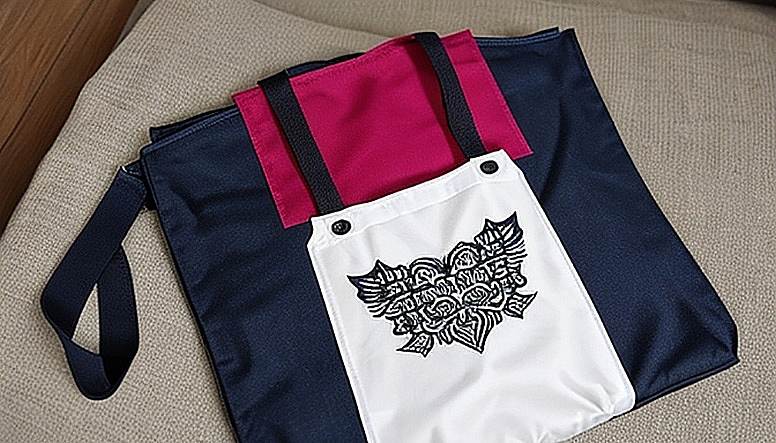
Creating your very own customized tote bag is a fun and functional DIY project. Not only does it unleash your creative side, but it also gives you a chance to create something that aligns with your style.
Choice of Tote Bag Material
You can choose from a variety of materials such as canvas, cotton, linen, or denim. Canvas is the most commonly used due to its durability and ease of handling. However, cotton is perfect if you're looking for a more lightweight option. If you prefer something sturdy, denim is a great choice.
Methods For Designing and Decorating The Bags
You can personalize your tote bag in multiple ways. You can paint on them, embroider them, or use fabric markers to draw your designs. Consider using:
- Stencils for those tricky patterns
- Fabric markers for doodles
- Heat transfer vinyl for text designs
- Embroidery for a meticulously handmade touch
Tips for Making Your Design Durable
To ensure that your design lasts, remember to:
- Use fabric paints or markers that are waterproof and non-fading
- Set your painted design by ironing the opposite side of the bag on low heat
- Hand wash your bag to preserve your pattern
With these steps, your customized tote bag will not only be your weekend project, but your go-to accessory for many weekends to come.
Craft 7: Hand-stamped Tea Towels
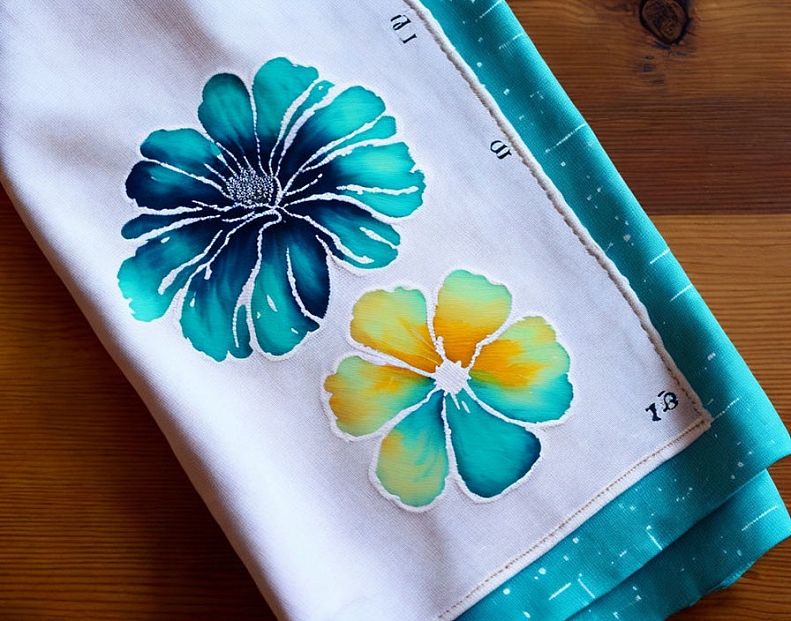
Weekends and DIY projects go hand in hand. This weekend, why not spend time creating something beautiful yet functional for your home? Try your hand at making hand-stamped tea towels. Not only are these lovely to look at, but they also add a personalized touch to your kitchen space.
Supplies Required
Decorating your very own tea towel is a fun task that requires just a few simple supplies:
- Plain tea towels or unbleached cotton fabric
- Fabric paint in colours of your choice
- Hand-carved or pre-designed blocks for stamping
- Foam brushes
- Iron (for setting the paint)
Step-by-Step Guide to Stamping Towels
Start by applying fabric paint to your chosen block. Press the block firmly onto the tea towel to imprint the design. Repeat this process using different colours and designs as desired. Once you are satisfied with your masterpiece, iron it gently to set the paint. Remember to wash your newly crafted towels separately for the first few washes to avoid colour bleeding.
Ideas for Using Stamped Towels in Your Home
Stamped tea towels are not just for kitchen use. They make beautiful additions to your powder room as hand towels or can be used as unique, personalized placemats. You can even frame them and use them as a creative piece of wall art. Or given as customized gifts, your hand-stamped tea towels will surely impress your friends and family. With multiple uses, this craft gives you a fantastic way to exercise your artistic streak over the weekend!
Craft 8: Embroidered Wall Art
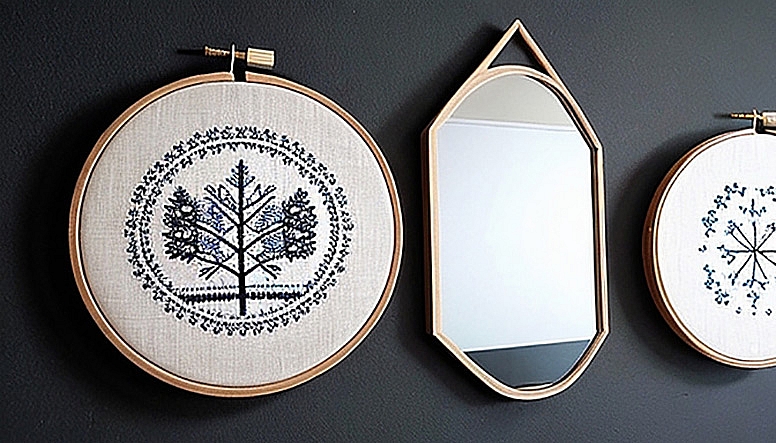
Transforming simple everyday objects into breathtaking works of art is very fulfilling. With just some colourful threads and a needle, you can create embroidered wall art that adds a personal flair to your home. Not only is it a craft steeped in tradition and history, but it also serves as an excellent stress reliever!
Materials Needed for Embroidery
Getting started with embroidery isn't complicated. A beginner will need:
- An embroidery hoop, which keeps the fabric taut while you work.
- Embroidery needles in different sizes.
- Floss or thread in your choice of colours.
- Cotton or linen fabric to serve as your canvas.
- Embroidery patterns or stencils, if desired.
Techniques for Creating Embroidery Designs
Once you've gathered your materials, you can start your embroidery journey. The trick is to start simple. Learn basic stitches first, like the running stitch, chain stitch, and cross stitch. As you get more comfortable with these stitches, you can explore more complex designs.
Displaying Embroidered Art in Your Home
When your embroidered piece is complete, proudly display it as wall art! Simply, keep it stretched in the hoop and attach a ribbon or a hook at the back. Alternatively, you can frame it for a more polished look. As you create more pieces, consider clustering them together to create a gallery wall for maximum visual impact.
Craft 9: Homemade Bath Bombs
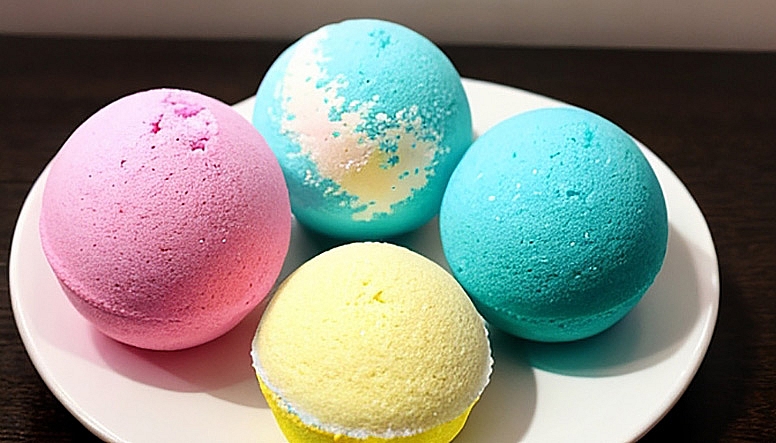
Remember the joy you found in a bath as a child, surrounded by your favourite bubbles or bath toys? A good bath can become magical with the help of an effervescent, aromatic bath bomb. Let's turn this moment of relaxation into a DIY project.
Ingredients and Tools Needed
Creating your bath bombs is incredibly easy and requires only a few ingredients:
- 1 cup baking soda
- 1/2 cup citric acid
- 1/2 cup Epsom salt
- 1/2 cup cornstarch
- 2 1/2 tablespoons almond or coconut oil
- 3/4 tablespoon water
- 2 teaspoons essential oils (like lavender, rose, or chamomile)
- A few drops of food colouring, if desired
As for tools, you'll need a bath bomb mould (or a silicone muffin tin), a mixing bowl, and a whisk.
Step-by-Step Instructions for Making Bath Bombs
Making your bath bomb is similar to baking, except you don't need an oven! All you need to do is:
- Mix the dry ingredients (baking soda, citric acid, Epsom salt, and cornstarch).
- In a different container, mix your oil, water, essential oils, and food colouring (if using).
- Gradually add the wet ingredients to the dry. The mixture should begin to clump like wet sand.
- Firmly press the mixture into your mould.
- Allow it to dry for a few hours or overnight. Then, simply pop out your bath bomb, and it's ready to use!
Benefits of Using Homemade Bath Bombs
Not only does this craft allow you to customize your bath experience, but making your bath bombs also gives you control over what's touching your skin. Store-bought bath bombs can contain harsh chemicals, but with homemade ones, you're in charge! Plus, they make great gifts for loved ones or a luxurious weeknight treat for yourself.
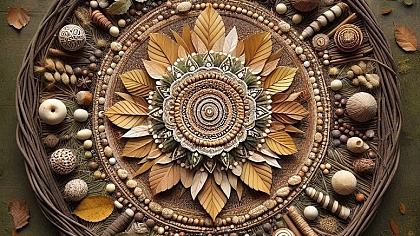
Craft 10: DIY Dreamcatchers
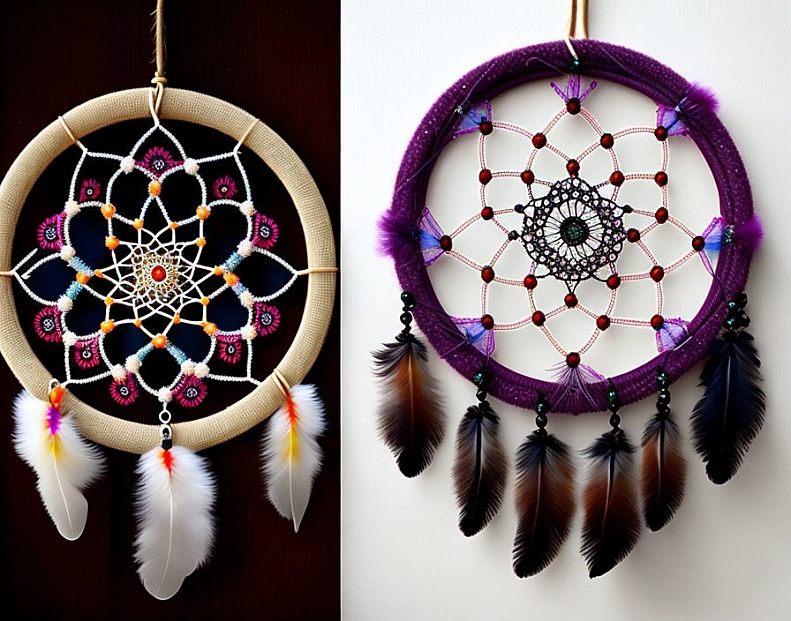
Dreamcatchers are a beautiful and whimsical addition to any room. Not only are they endearing to look at, but they also carry a rich history and cultural symbolism. Best of all, they are fun and easy to make!
Choice of Materials for Dreamcatchers
The key to an impressive dreamcatcher is choosing the right materials. Start with a sturdy hoop, usually made from metal or wood. Then, you will need medium-weight string or yarn to weave the intricate web pattern. Add a personal touch with some coloured beads and feathers.
Step-by-Step Guide to Making Dreachers
Making your own dreamcatcher can be as simple as following these steps:
• Secure your chosen yarn on the hoop.
• Weave the string in a web-like pattern.
• Add a bead or two to the centre for some sparkle.
• Finally, attach feathers using smaller pieces of the string.
Ways to Customize Dreamcatchers to Fit Your Style
There are countless ways to customize your dreamcatcher to match your desired aesthetic. Why not use different colour combinations for the strings and feathers? Or incorporate unique beads, bells, or charms into your design? Maybe use thick wool for a bohemian chic, or embroidery thread for a more delicate touch.
Let your creativity shine and create a piece that perfectly captures your style and adds an extra appeal to your space. Enjoy crafting your weekend dreams!
Wrapping up your weekend with some crafting fun is a rewarding way to unwind and tap into your creative side. Whether you're a seasoned DIY guru or a craft novice, these ten weekend craft ideas offer a unique blend of fun, relaxation, and creativity, perfect for all artistry levels.
Recap of 10 crafts for weekend warriors
We started by creating beautiful tie-dye shirts, then moved on to making unique scented candles, creating bohemian macramé patterns, and more! Remember, each project can bring a unique touch of personal flair to your home or act as thoughtful, handmade gifts.
Encouragement to try out these enjoyable DIY projects
Don't be afraid to get your hands dirty and give these projects a try! Crafts not only offer a creative outlet, but they can also help reduce stress and serve as a fun weekend activity.
Reminder to unleash your creativity and have fun with your hobbies
We hope this list has inspired you to try something new and unleash your hidden talents. Regardless of the result, the real joy is in the journey of creation itself! Go ahead, rock the world with your craft skills, and most importantly, have fun. After all, weekend crafts indeed make lovely warriors out of us all.
